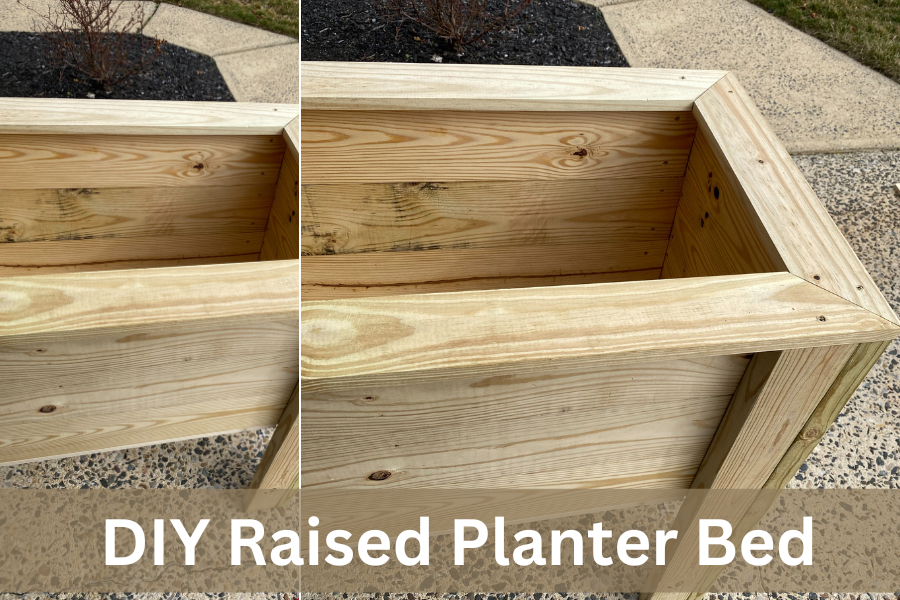
Have you always wanted to create a home garden full with veggies or flowers? This DIY raised planter box with legs is the perfect addition to your garden! Whether you are very handy or have never built anything in your life, building your own garden bed is easier than you think!
One of my goals this year was to start a small vegetable garden in my backyard! With the prices of fresh produce and cost of living rising, a garden is a great way to save money on some of your favorite veggies. I knew that I wanted a raised bed because we have alot of chipmunks and rabbits that like to munch on our plants so I quickly decided my garden bed needed legs. I am here to show you that it is possible to make your very own garden bed and will show you everything you need to make it.
In this blog post we will show you how to build your very own DIY raised planted bed. Spring is just around the corner and this DIY raised garden box is the perfect touch to your homes garden. So get your tools ready and your green thumb because it is time to make your very own DIY raised garden bed!
This post is about how to DIY raised planter box.
*Please note as an Amazon associate I earn from qualifying purchases.
Buy A Raised Planter Box Cover

Add this cover to your cart to help keep your veggies or garden protected from the harsh winter elements!
DIY raised planter box with legs
The idea of the raised garden box is very appealing due to the fact that the bed is raised and away from predators and pets. Most of the garden planters for sale were expensive and the wrong size for the space needed. So I was off to Pinterest for some inspiration.
Jennifer Meyering’s step by step guide on building a raised garden planter seemed like the perfect plan! This guide was not only easy to follow, but also reasonable to understand. I have a handy husband that built all of it for me, but I was still able to actually help him with it.
Check out her page for her explanation on how to build this planter. A big shout out to her blog for all of the inspiration and tips! Below is my summary on the step by step raised garden planter box.
How to build the DIY raised planter box
DIY Raised Planter Box in 5 Easy Steps
WHAT YOU WILL NEED:
- 1x6x6 (6)
- 1x2x8 (2)
- 2x4x12 (2)
- 1x4x6 (2)
- Miter saw
- Drill Set
- 1 5/8 in wood deck screws
- Stain
- Sealant
- Larger deck screws 3 inch
- Pencil
- Square Level
- Tape measure
BEST HOME TOOLS FOR DIY PROJECTS:
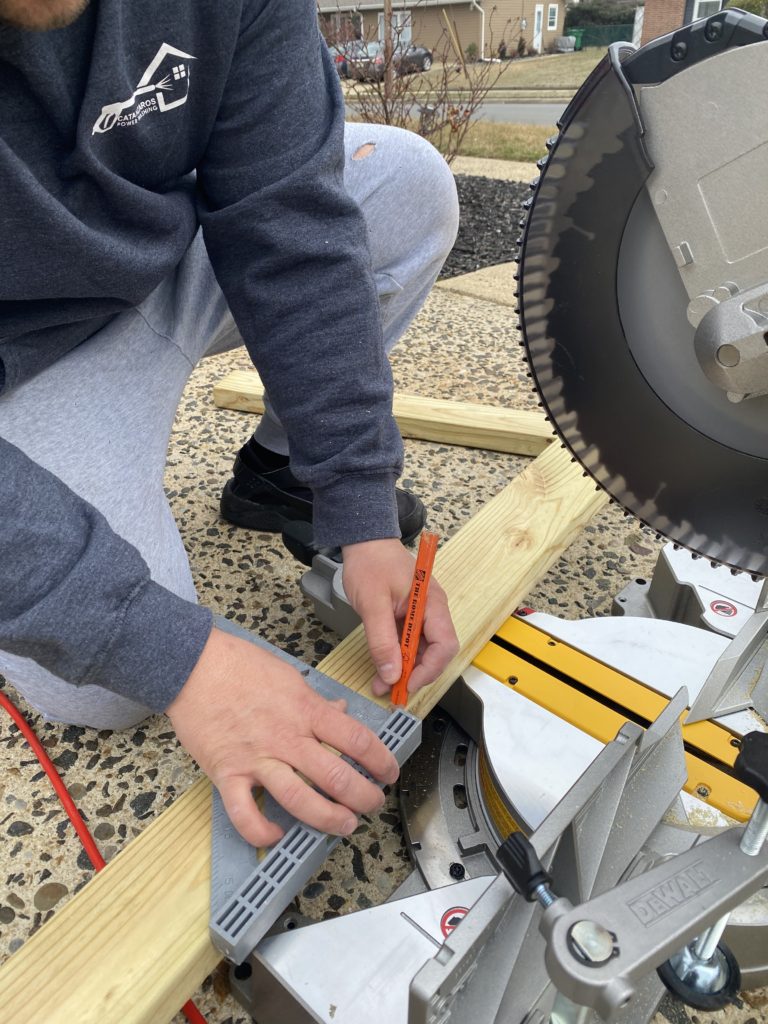
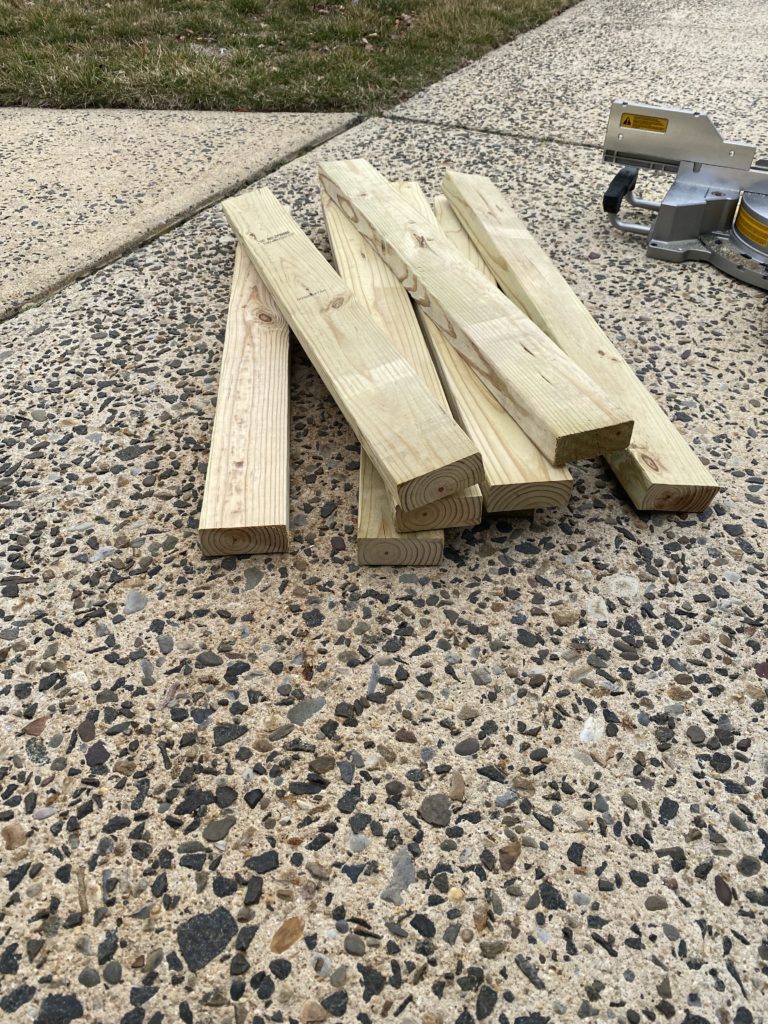
BEFORE YOU START BUILDING, CUT YOUR WOOD:
We used pressure treated pine from Lowes for the lumber. First thing she suggests to do is to make all of your cuts. She breaks it down into what cuts make the corresponding sections of the planter.
The Legs:
- Cut and measure the 2x4x12 into 3 foot sections (making 8 of them)
The Sides:
- Long side
- Cut and measure the 1x6x6 into 3 foot sections (making 6 of them)
- Short side
- Cut and measure the 1 x 6 x 6 into 1.5 foot sections (making 6 of them)
Bottom:
- Cut and measure the 1 x 2 x 8 into 30.5 inch sections (making 2 of them)
- Cut and measure the 1 x 2 x 8 into 14.25 inch sections (making 2 of them)
- Cut and measure the 1 x 6 x 6 into 16.5 inch sections (making 6 of them) these are for the inside of the bottom of the planter
- Cut and measure the 1 x 2 x 8 into 16.5 inch sections (making 2 of them) these are for the inside of the bottom of the planter
Finished top
- Cut and measure the 1 x 4 x 6 into 40 5/8 (making 2 of them) note cut these with mitered edges
- Cut and measure the 1 x 4 x 6 into 21 3/8 inch sections (making 2 of them) note cut these with mitered edges
A Step by Step Guide on How to Building a Raised Planter with Legs
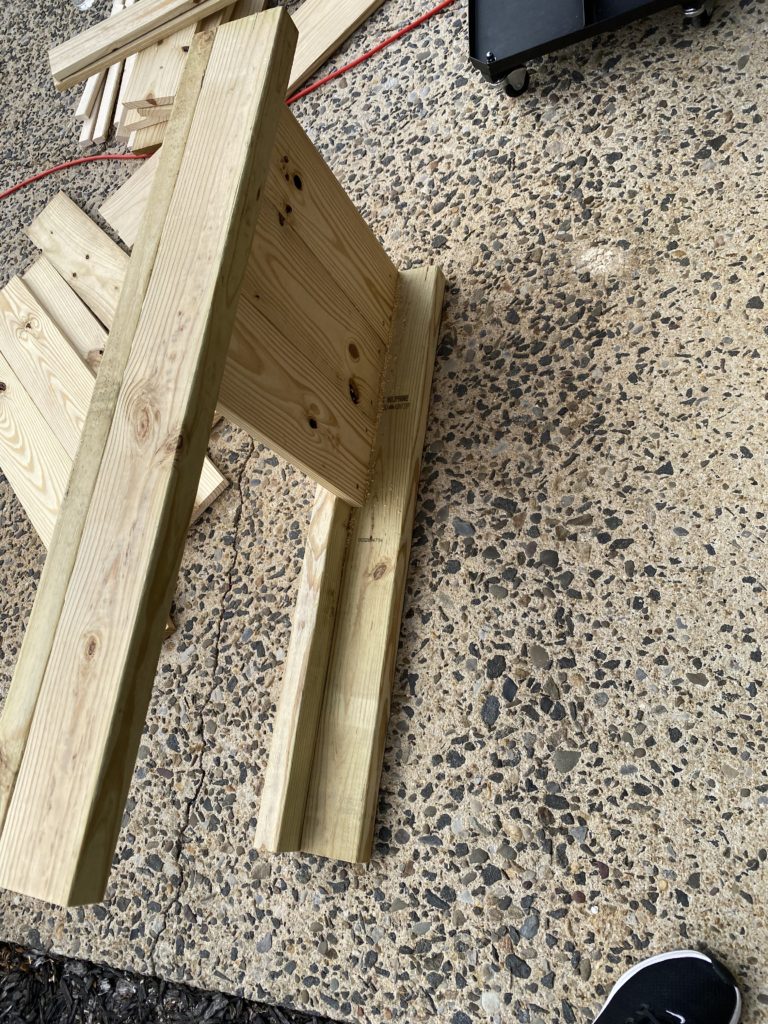
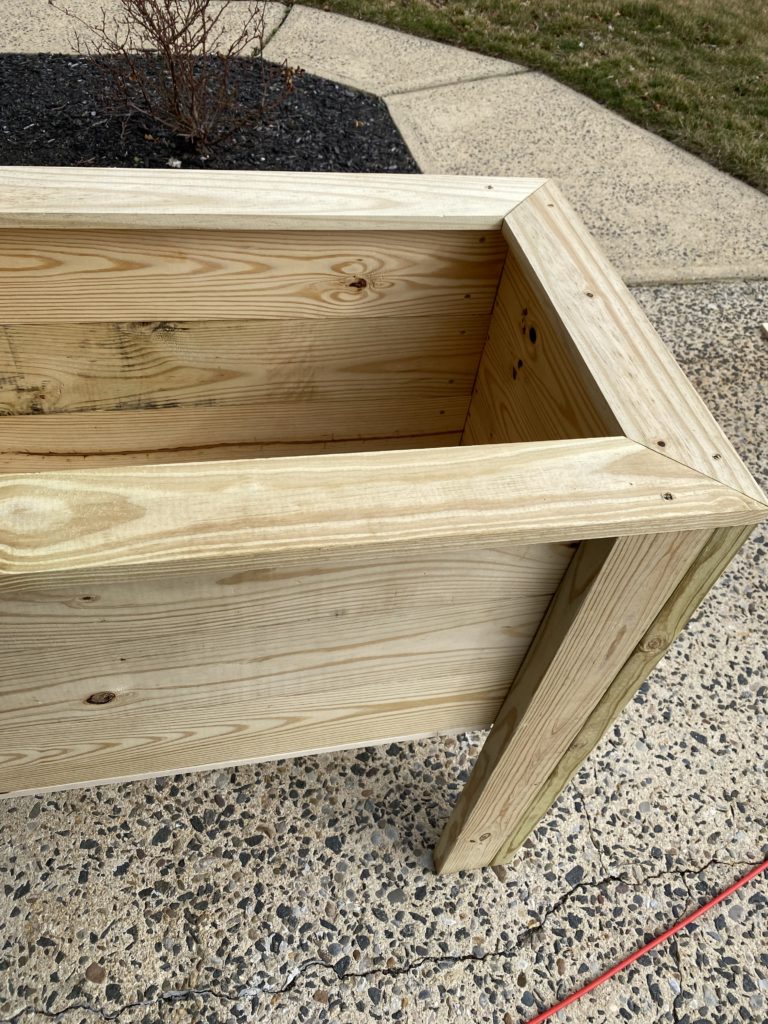
- First, take the 8 2×4’s you have cut for the legs and put them together making an L. Screw them together with the larger screw (3 inch screw is suggested). Note there will be a short side and long side to each L. See the picture below

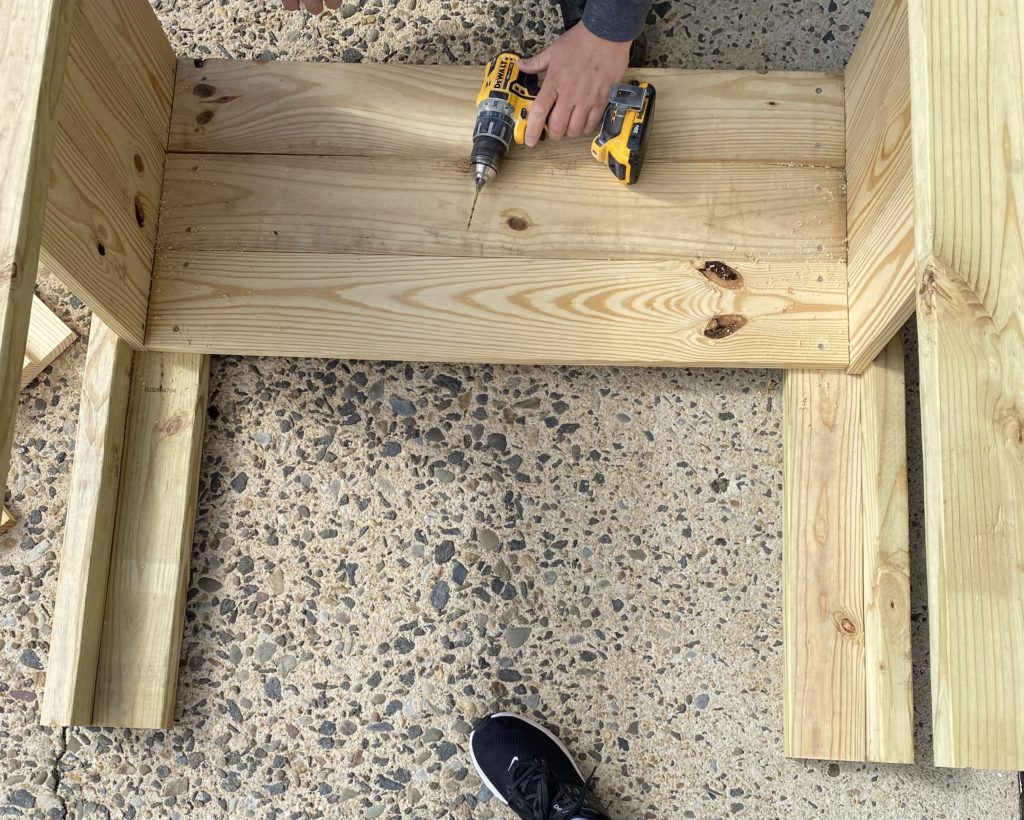
2. Second, time to assemble the sides.
You will be using these pieces:
- 1x6x6 (3ft) 3 of them per side
- 1x6x6 (1.5ft) 3 of them per side
Pre drill your holes in 1 x 6’s where you want to place the screw to avoid the wood cracking.
Screw the 1×6’s to the legs with the 1 5/8″ screws.
The long parts of the L (legs) are for the long sides of the planter. The Short parts of the L are for the short sides of the planter.
Attach all sides of the planter and stand it up upside down so the legs are facing up. Note: It really does not matter the order that you attach the sides together, just try to keep everything level and straight as you screw it to together.
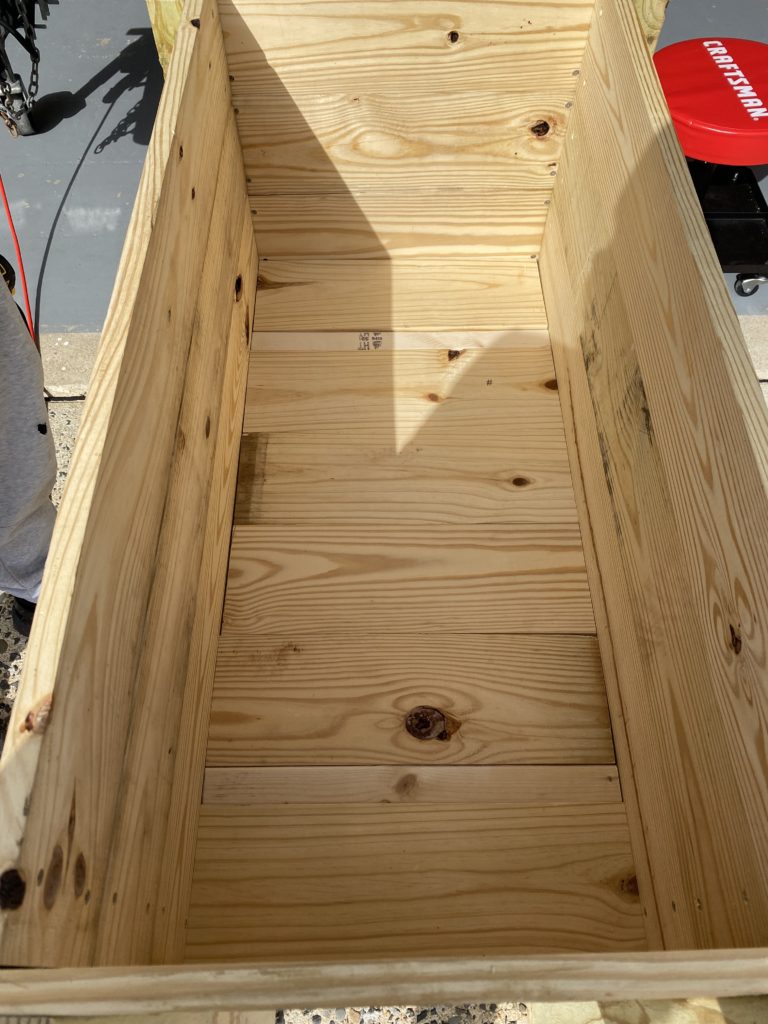
3. The third step is to screw (use 1 5/8in screw) to your 4 bottom support 1 x 2 section pieces, overhanging most of the 1 x 2 into the box so it will hold the bottom up. Remember this is where you will attach the bottom pieces on to.
4. Now, it is time to assemble the bottom of your planter. Flip the planter on its legs now and screw the remaining 1 x 6 pieces and 1 x 2 pieces to the bottom supports from step 3.
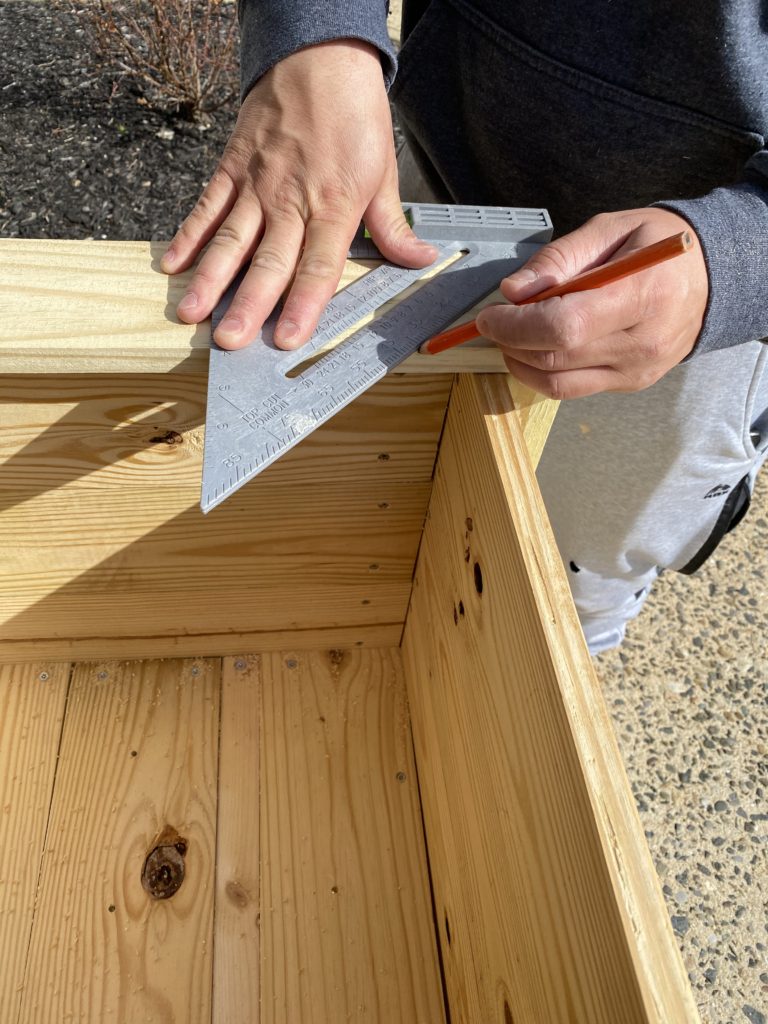
5. Lastly, create the top decorative edge.
For this top you will need these cuts you previously made
- 1 x 4 x 6 into 40 5/8 (making 2 of them) remember these have mitered edges
- 1 x 4 x 6 into 21 3/8 inch sections (making 2 of them) remember these have mitered edges
Make sure these pieces are laying flat on top of the legs and are flush with one another. Go ahead and screw them down to the planter.
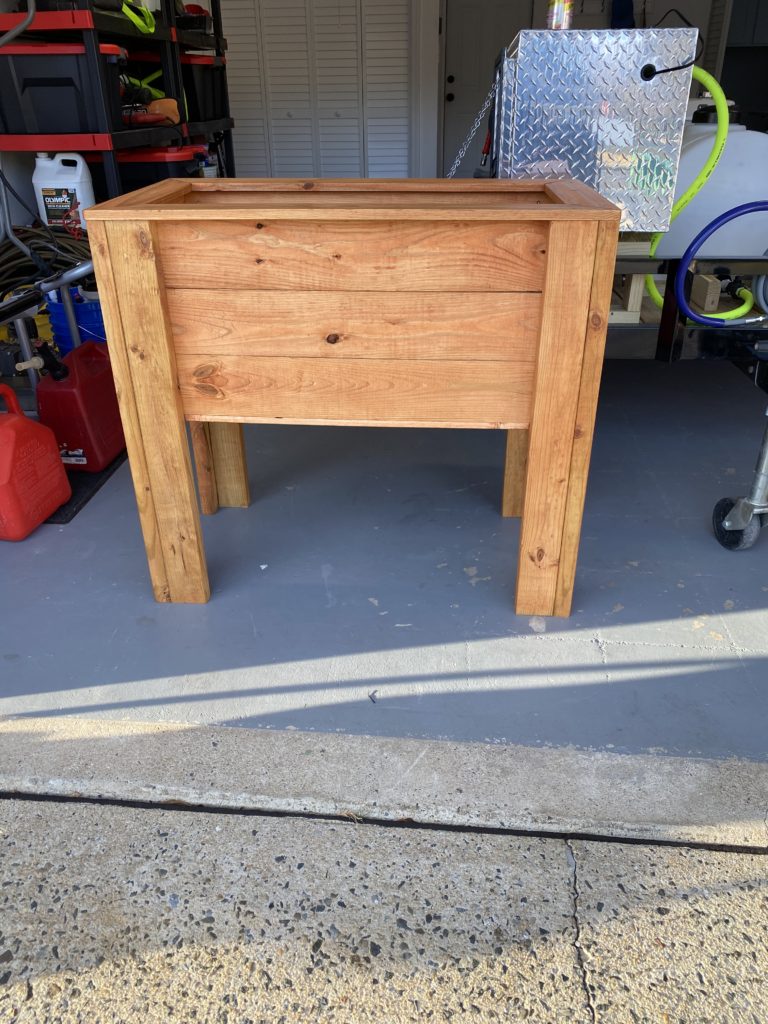
Finally, your DIY raised planter box is done! Now is when you can sand down the lumber and add any sealant or stains to your planter box. This helps the planter keep its integrity. Sanding the box down can remove any weird marks or stamps on it. We used a Colonial Maple Stain from Home Depot for our planter.
We also drilled holes in the bottom of the planter so that the water will drain properly. The plan is to fill the planter with kale, tomatoes, scallions, and all of my greens! I am so excited for the spring and can’t wait to share with you my garden journey.
This was very easy to assemble and only took us about 2 hours to make. I highly recommend checking out Jennifer Meyering’s post for building a raised planter box to see where I found this DIY from. Hope this was helpful! Please comment if there are any questions. Check out my latest post on how to make your home feel expensive!
This post was all about how to make a diy raised planter box.
CHECK OUT THESE SIMILAR BLOG POSTS:
- 17 Best DIY Gifts to Delight Your Loved Ones This Holiday Season
- Crafting Cozy: 23 Adorable DIY Fall Home Decor Ideas
- 13 DIY Father’s Day Gift Ideas